Introduction
For my React workshops I use MDX-Deck as my presentation tool. MDX-Deck is a React application which let's you write your slides in MDX, a combination of MarkDown and JSX.
Besides the presentation slides I also show prefab example code or do live coding. Because MDX-Deck let's you incorporate any React component or even let's you do live coding within the slides with mdx-deck-live-code, I could use that so I don't have to leave the presentation when I show example code.
However, I really want to use CodeSandbox in my workshops because that's to cool to be true, but mdx-deck-live-code doesn't seem to work in CodeSandbox. Furthermore, mdx-deck-live-code seems to have some limitations, for example using the React built-in hooks like useState.
So what I did until now was switching between the MDX-Deck slides I host on Netlify and the example code I build in CodeSandbox.
Today I decided to make my own solution for being able to both show presentation slides and example code in one web app in CodeSandbox. This seems like a nice project to build myself and I like the idea of eating my own dog food during my workshops.
Usage
Let's start with describing how I want to use the app during my workshops, so I know what to build.
First of all, as I said, I want to use CodeSandbox. So during my workshop I will open the app in CodeSandbox, which default shows both the code and the browser pane. In the browser pane I click "Open in New Window". I drag that tab to a new browser window and set both windows to full screen mode so I can swipe between these two windows using three fingers.
From now on, I'll refer to these two windows as "code view" and "presentation view"
I swipe to the presentation view where the first slide of my presentation is shown. I do my talking and with my keyboard arrow keys I navigate to the next (or previous) slide. While navigating through the slides I come across an example code slide. It's a slide that has a slightly different layout so you can recognize it's time to show (or create) some example code.
I swipe to the code view, where the same slide is shown in the browser pane, open up the example code file and start coding and talking. As I adjust the code the results are immediately visible in the browser pane.
When I finished making and explaining the code I swipe to the presentation view again, navigate to the next slide and continue my presentation. Then, after a few slides I'll hit an example code slide again, swipe to code view, do my coding and talking, return back to presentation mode, and so on.
Prototype
I'll start with a very minimal, but working prototype so I can check my solution as soon as possible and can make decisions on whether or how I will proceed.
My proof of concept consists of 3 slides: a presentation slide, a example code slide and another presentation slide.
I open up CodeSandbox and create a new app with the create-react-app template. I create
3 components for the slides and let the App component render the Slide1 component:
function App() {
  return <Slide1 />;
}

function Slide1() {
  return (
    <>
      <h1>Welcome to my REACT workshop!</h1>
      <p>Today I will learn you how to create a Hello World component :)</p>
    </>
  );
}

function Slide2() {
  return (
    <>
      <h1>Example 1</h1>
      <HelloWorld />
    </>
  );
}

function Slide3() {
  return (
    <>
      <h1>Thank you for attending my workshop!</h1>
      <p>and goodbye</p>
    </>
  );
}
Slide2, the example code slide, renders a HelloWorld component which I placed in a
separate file. Because I want to live code this example it only contains a placeholder
that returns nothing:
// ./examples/HelloWorld.js
export default () => null;
Navigating between slides
Nice, let's add some navigation to the App component. For now, I'll add prev and
next buttons, and functions that will handle clicking these buttons:
function App() {
  function goToPrev() {
    /* TODO: go to previous slide */
  }

  function goToNext() {
    /* TODO: go to next slide */
  }

  function Navigation() {
    return (
      <div>
        <button onClick={goToPrev}>prev</button>
        <button onClick={goToNext}>next</button>
      </div>
    );
  }

  return (
    <>
      <Navigation />
      <Slide1 />
    </>
  );
}
Now it's time to make the navigation work. I put all the slide components in a slides
array. And I need to add some state to the App component so it knows which of the slides
must be displayed. Therefore I add a currentSlideIndex variable to state which refers
to an index of the slides array.
Also I implement the goToPrev and goToNext functions that determine the correct
currentSlideIndex:
function App() {
  const slides = [Slide1, Slide2, Slide3];
  const [currentSlideIndex, setCurrentSlideIndex] = useState(0);

  function goToPrev() {
    if (slides.length > 0 && currentSlideIndex > 0) {
      setCurrentSlideIndex(currentSlideIndex - 1);
    }
  }

  function goToNext() {
    if (currentSlideIndex < slides.length - 1) {
      setCurrentSlideIndex(currentSlideIndex + 1);
    }
  }

  console.log(currentSlideIndex);

  /* code below has not changed */
The console.log(currentSlideIndex) displays the correct index after each render, so we
know the buttons work. All we need to do now is to render the current slide component.
The nicest way (I know) to do this is to create a variable that contains the currently
selected slide component. I call this variable Slide with a capital S so we can render
it in the JSX as if it were a normal component:
function App() {
  const slides = [Slide1, Slide2, Slide3];
  const [currentSlideIndex, setCurrentSlideIndex] = useState(0);

  /* code in between has not changed */

  const Slide = slides[currentSlideIndex];

  return (
    <>
      <Navigation />
      <Slide />
    </>
  );
}
Storing the current slide between renders and browser tabs
These are two very important features. Let me clarify what they mean.
During the workshop I will edit example code, which results in the app being recompiled and restarted, which means the presentation will start at the first slide again. So I need a way to preserve the current slide so it stays on that slide during re-renders.
Another requirement I have is that when I switch between the presentation and code views I want the current slide to be in sync. Otherwise I have to navigate to the example code slide manually first when switching to code view.
I tried to build this myself by fiddling around with local storage, useEffect and
setInterval, but I couldn't get it to work. When I googled for a solution for these
requirements I stumbled upon the use-persisted-state library. Looking at the source
code I realized it indeed is not easy to sync state across multipe instances of a web app.
This library stores state in local storage, which solves the re-render problem I have
when I edit example code. It also let's you sync state between components across different
browser tabs or windows. It does this by offering a factory function that creates a custom
hook that you can use instead of useState so the library can take care of syncing state.
The state of currentSlideIndex is now handled as follows:
const useCurrentSlideIndexState = createPersistedState("currentSlideIndex");
const [currentSlideIndex, setCurrentSlideIndex] = useCurrentSlideIndexState(0);
Demos
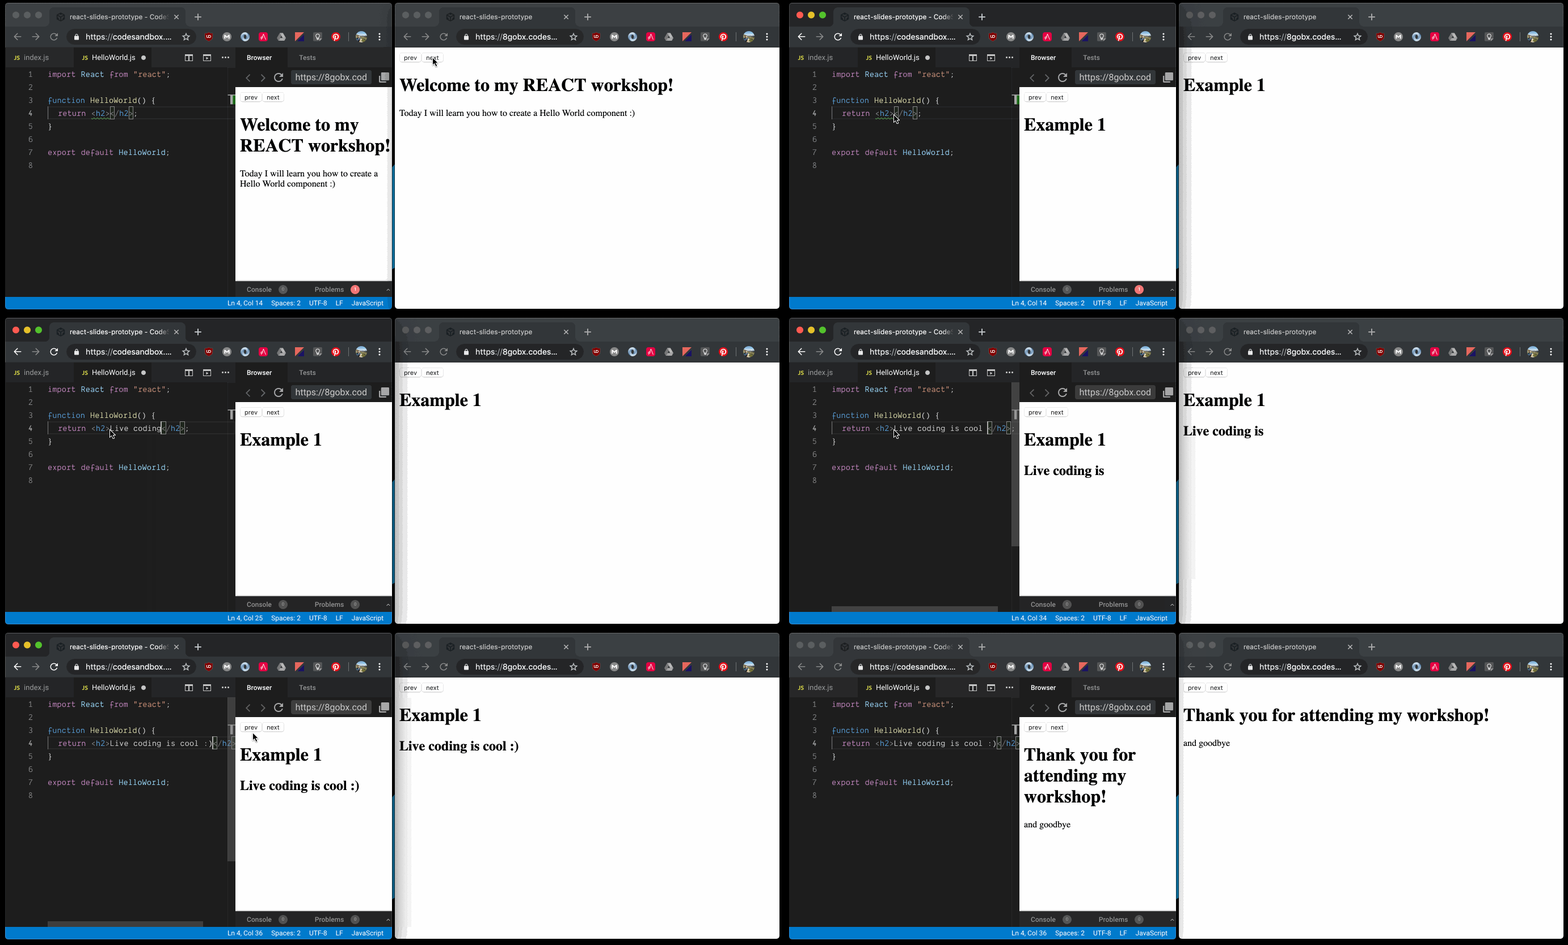
See how the code view (left) and presentation view (right) are kept in sync, both when moving to the next slide as well as when live coding:

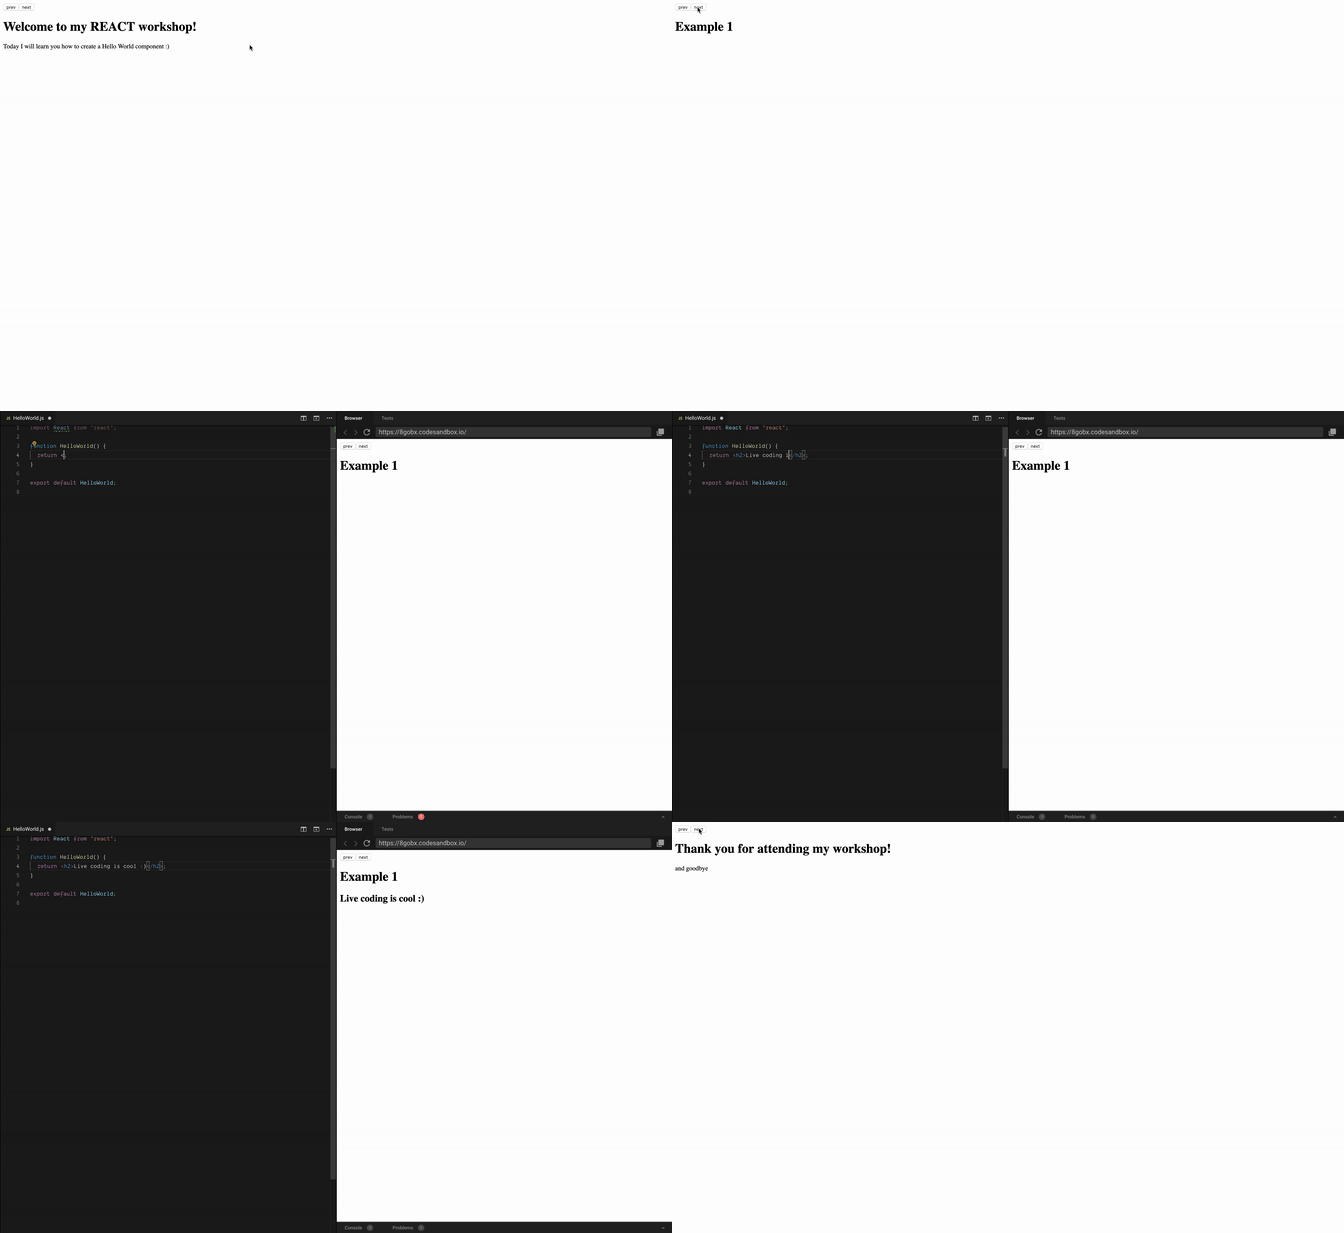
And here is how I will use it in full screen mode:

Done! :)
To check out the code, go to this CodeSandbox or to the Github repo
What's next?
This prototype has convinced me I can build my new presentation tool with it. Of course a few things have to be done before it's ready for using it in my workshops. Things like keyboard arrow navigation, CSS styling, code refactoring, etcetera. But that's something for another blog post.